
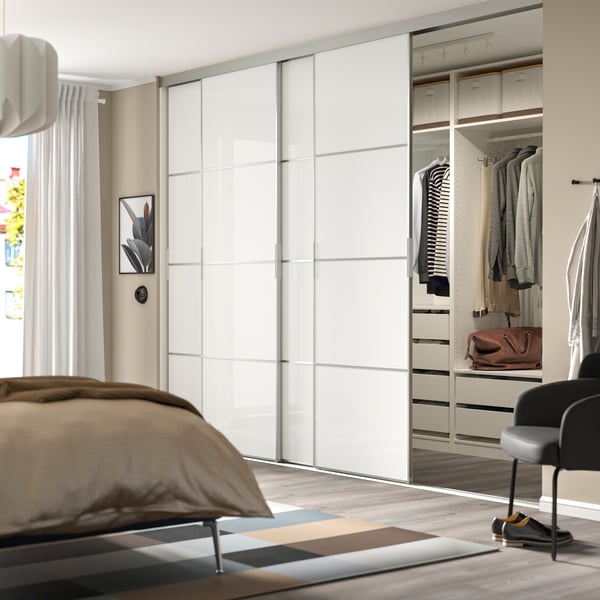
How to assemble a SKYTTA system

Although you can assemble and install our SKYTTA sliding door system yourself, it is important to consider all different situations you might encounter based on the height of your ceiling. 

For example, if your ceiling is too low, or you install the doors in a room with a sloping ceiling, you will need to cut the door frames and panels*.

*This step requires more skill and experience than others and we strongly recommend you get the help of a professional carpenter who has the right tools.

1. Ready, set, measure!

It's very important that you measure the exact place where you want to place the doors and ensure that the surface is straight, to do this you should:

• Measure the width and height of the space.

• Measure from the floor to the ceiling in at least three places, as they may be slightly uneven.

• Irregular or angular surfaces should be adjusted before the doors are installed.

How to take measurements

2. Choose your preferred storage system

Generally, you can choose which storage solution to place behind the doors. It's important to ensure that:

• You have sufficient space for the storage solution, the depth of the rails plus a little extra (we suggest having a minimum of 30 mm between the sliding doors and the storage behind them).

• You have considered the characteristics and structure of the system behind the doors. For example, drawers shouldn't be placed behind the point where the doors overlap, unless both doors can be moved away from the limits of the drawer, otherwise the drawer will not open.

See storage systems
Open wardrobe with a flowered background and white SKYTTA door
See storage systems

3. Create your dream combo by choosing from the colours and panels available

The SKYTTA sliding door frames come in white, aluminium and black and you can combine them with all the panels from the PAX range. It's up to you whether you choose a solution that matches your room or to create a contrasting effect. Unleash your creative side!

Panels are sold in packs of four, so for each SKYTTA door you choose, you also need one pack of panels. There is a wide variety of colours, materials and finishes to choose from and mix and match.

*Remember that some panels have a different colour or finish on the reverse side, so it may be useful to ask if you are planning a solution where the doors can be seen from both sides.

See panels
Bedroom with a wardrobe with SKYTTA doors
See panels

4. Almost there! You just need to assemble and install your combination

Rail assembly

Door assembly

Disassembly

Always remember:

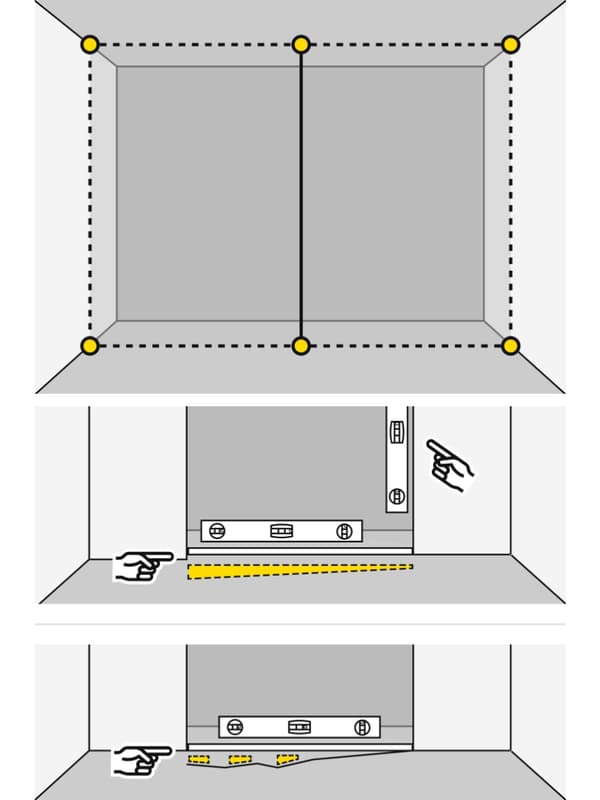
  • Measure the exact place where the doors will be placed and make sure that each surface is straight.
  • Adjust irregular or angular surfaces before the doors are installed.
  • If you use a ceiling height reducer, remember that you'll need to paint it.

If you need further information, here is the complete installation guide: