Kitchen installation guide
Our kitchens are designed to be installed by you, yes you! We know this might be scary, so we created a step-by-step guide to help you get started and finish you dream kitchen within days.
4 - Installing the mounting rail
Rather watch a video? In this video you will find a summary of the installation.

1. Before you start
- When your kitchen is delivered, check that all the elements are present: make sure that you have received all the boxes that appear on the delivery note.
- Only dismantle your old kitchen after you have received all the components and have a licensed professional cut and connect the gas, water and electricity.
- Store all items indoors, at room temperature, and dry.
- Store the items flat, in particular the very long elements (worktop, columns, et cetera) so that they do not become veiled. Make things easier by arranging the boxes in the order of installation using the list of packages.
2. Materials and tools
Read the assembly instructions before you start to find out what tools you will need. Wear safety glasses if using a power tool.
- Fine-toothed handsaw
- Glue clamps
- Level
- Measuring tape
- Electric Screwdriver/Driller
- Square
- Jigsaw
- Hole drill
- Hammer
- Rubber mallet
- Pencil
- Awl
- Circular saw
- Cross screwdriver
- Flat screwdriver
- Miter box and saw
Good to know
The materials of the walls being very different from one room to another, the screws and dowels are not provided. Most hardware or DIY stores will provide you with the hardware and advice needed for your type of wall. The plate's 6 mm2 power cable is not supplied. You will also find it in hardware stores or DIY stores.
Complete step 3: preparing your room and step 4: installing the mounting rail, by watching this helpful video. Below you'll also find step-by-step instructions.

3. Prepare the room
After dismantling the old kitchen, prepare the room, making sure the walls and floor are square. This is also the time to prime, then paint the walls, lay the tiles if necessary and replace the floor covering.
Good to know
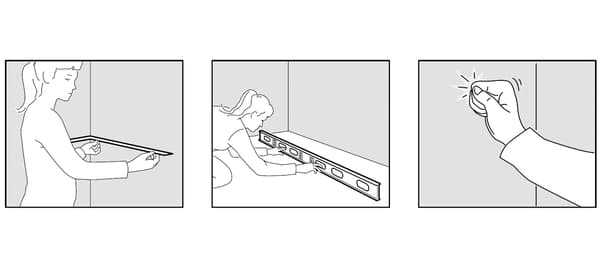
- Prepare the room: check if the corners, the walls and the floor are straight. Use your square in the corners and the spirit level for the walls and floor.
- Note the highest point on the floor and where the angles are not 90 degrees.
- Check that the wall is strong enough to support the suspension rail and the cabinets. Depending on the wall material, it is often advisable to mount the rail at the height of a (load-bearing) beam. An electronic beam finder can help with this.
- Measure 82 cm between the highest point of the floor and the bottom of the lower suspension rail.
- Double-check that the water supply is in the right place, according to your kitchen plan.
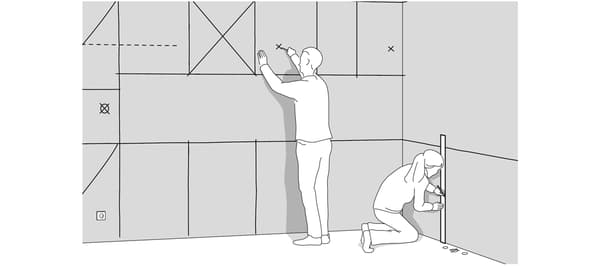
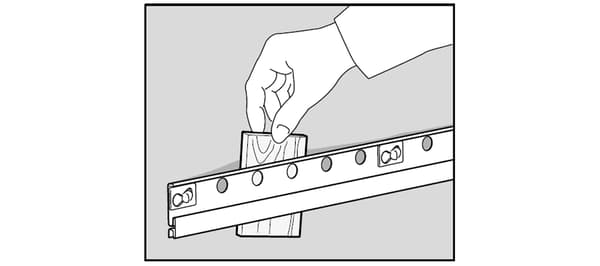
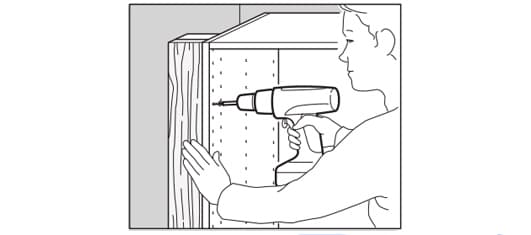
4. Installing the mounting rail
The IKEA cabinets hang on a fixing rail, which facilitates installation and adjustments. Please note that: this rail must be horizontal, level, and fixed to the wall using the appropriate screws and plugs.
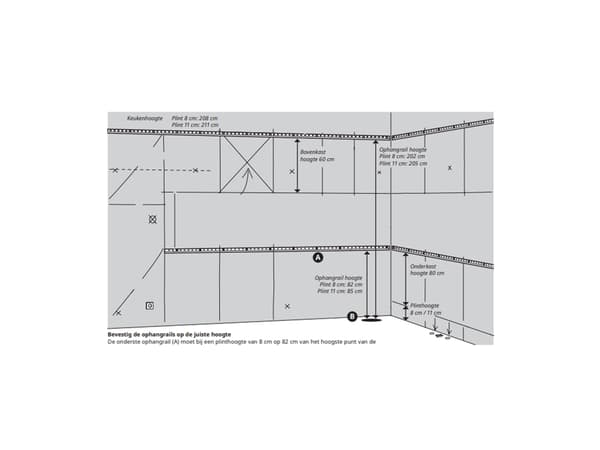
Fix the rails at the right height
The bottom of the base cabinet hanging rail (A) should be 82 cm above the highest point on the floor (B). If your kitchen is 208cm high, leave 120cm between the bottom of the base cabinet suspension rail and the bottom of the wall or tall cabinet rail. (If the kitchen is 228 cm or 248 cm high, leave 140 cm or 160 cm.)
Good to know
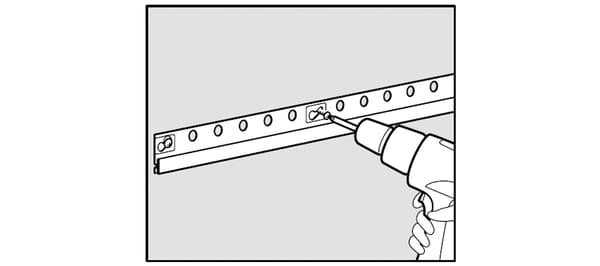
Lay the bottom rail first making sure it is perfectly horizontal.
If the wall is not straight, place shims between the wall and the rail so that the latter is straight.
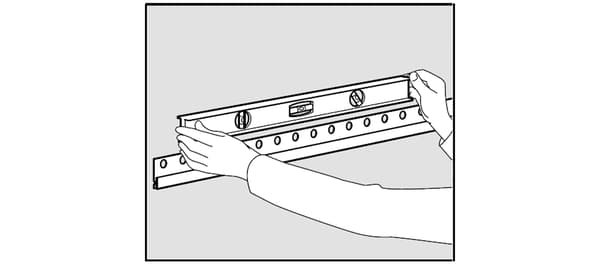
Check the horizontality of the rail with a spirit level.
5. Installation of the cabinets
In most kitchens, you install the wall cabinets first. You can then move freely without the base cabinets getting in the way. An exception is when you install a kitchen in one line with a tall cabinet at one end. In that case, install the tall cabinet first.
Some cabinets have pre-cut holes for pipes, but if necessary, you can use a jigsaw to cut holes yourself. Do this before installing the cabinet. Keep in mind that the location of the hole may affect where drawers can be mounted in the cabinet.
Below, you'll find our videos including step-by-step instructions for step 5.


Good to know
- If you need to install a column, do the final alignment and tighten the fixings only after you have installed all the other cabinets.
- If you have to put a kitchen island, it will have to be fixed to the ground using feet or a base. When drilling the floor, pay attention to the systems already in place: underfloor heating, plumbing, et cetera.
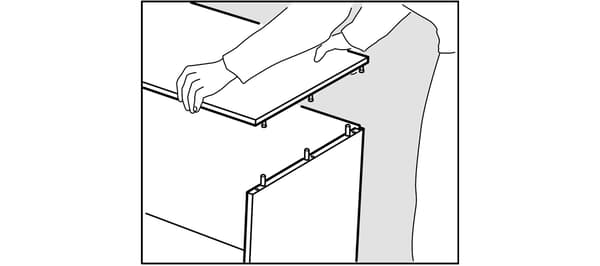
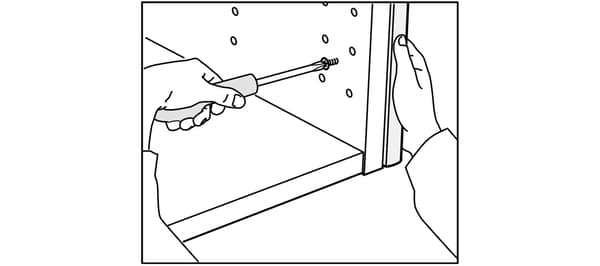
Mount the wall cabinets according to the instructions. The installation of drawers, doors and interior accessories is done after installation on the wall.
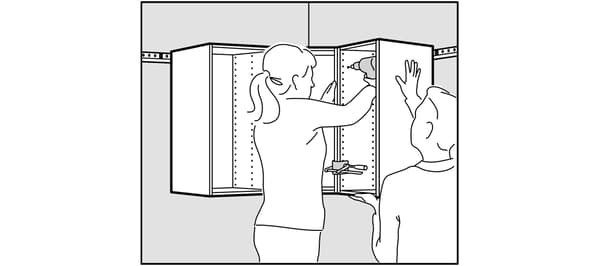
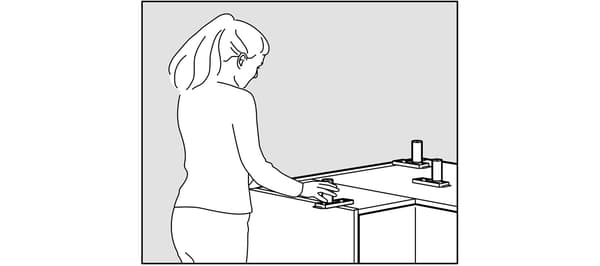
Install the corner box first. Tighten the screws. Hang the following cabinets and secure them using the screws provided. Do not fully tighten the screws before installing the base units, so that everything can be aligned.
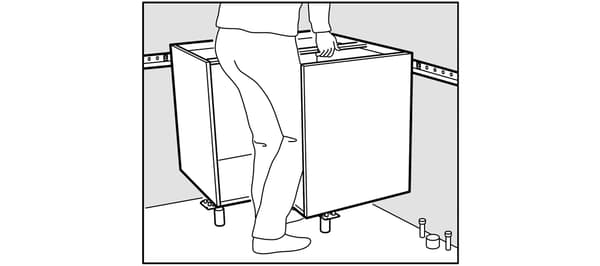
Mount the base cabinets according to the instructions. Be careful to place the feet in the order of installation of the cabinets.
First install the corner base unit. Repeat the operation for the following cabinets. This is also the time to install any swivel storage.
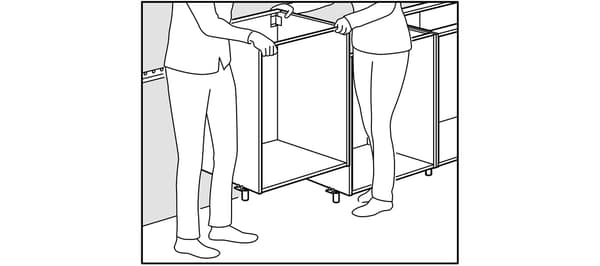
During installation, both cabinets can rest on cabinet legs that connect two cabinets together.
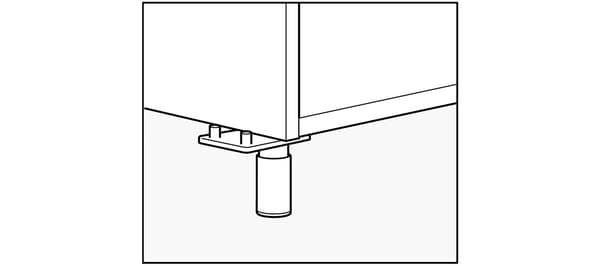
Do not forget the spacer ring supplied with the feet.

Make sure that the sink cabinet is alligned with the connection to the water supply.
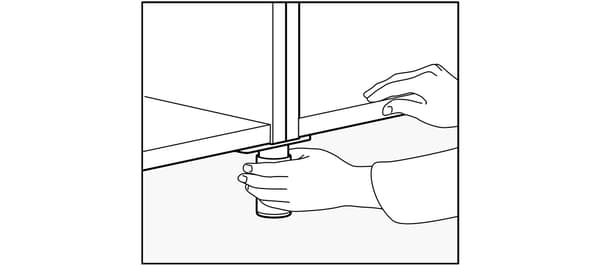
Align each box on the previous one by adjusting the feet.
If you are installing a tall cabinet, hang it on the suspension rail first before mounting the cover panel.
Filler pieces
Filler pieces are used between your cabinets and walls for a streamlined appearance and to ensure there is enough room to fully open doors and drawers. They are especially useful if your walls are not perfectly straight.
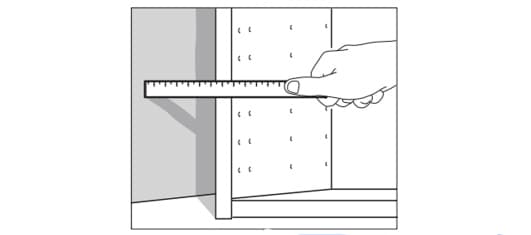
Check the wall with your level to see if it is straight. If the wall is even, measure between the wall and the cabinet and mark this distance at the top and bottom of the filler piece.

If the wall is not level and flat, the filler piece must be cut to fit to the wall’s shape. To do this, you’ll need a filler piece, measuring tape, small block of wood about 1 1/4" thick and a pencil. Cut the filler piece so it’s the same height as the cabinet.
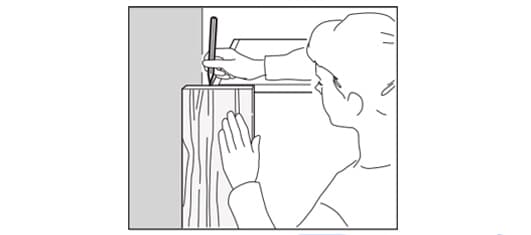
Place the edge of the filler piece against the wall. Hold the block of wood flat against the wall with the pencil against it. Keep them pressed against the wall as you slide them down the length of the filler piece. Now you have traced the shape of the wall onto the filler piece. Cut along your trace line. Place the newly cut edge of the filler piece against the wall, it should fit perfectly. Mark the edge of the cabinet on the top and bottom of the filler piece. Draw a straight line from these points and cut.
To ensure the filler piece stays in place, first attach a support strip to the wall. Drill holes in the cabinet for the screws you’ll use to attach the cabinet and filler piece together. Put the filler piece into place. Put screws through the holes you have drilled. When all your filler pieces are in, caulk around each one with silicone for an airtight seal.
Good to know
- If you are going to install a high cabinet, don’t make final adjustments or fully tighten the screws until you have installed all the other cabinets.
- If you're installing a kitchen island, itmust be secured to the floor using UTBYlegs or by building a frame. Fasten theframe to both the floor and the cabinets.When attaching the frame to the floor beaware of amenities like floor heating orplumbing already installed.
6. Installing worktop, sink, lighting and appliances
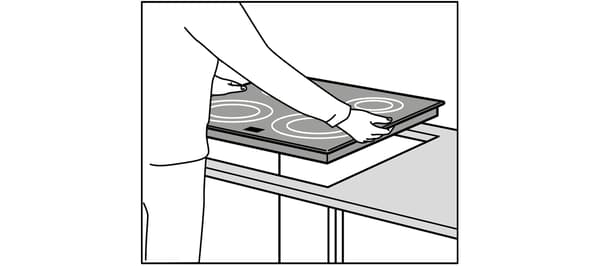
Now that the cabinets are installed, it is time for the worktop, sink, lighting and appliances. Check that the worktop has the correct dimensions before placing it. If you need to cut cutouts in the worktop for a sink or hob, do it now. Please not that: always use the assembly instructions as a guide.
When the worktop has been placed, you are ready for the connection of water, gas, lighting and appliances. All water, gas and electricity connections must be made by qualified professionals, and in accordance with applicable local safety regulations.
Ready to install the lighting, appliances, hob an sink? These videos show you how to do it.


Below, you'll find all necessary instructions to complete step 6.
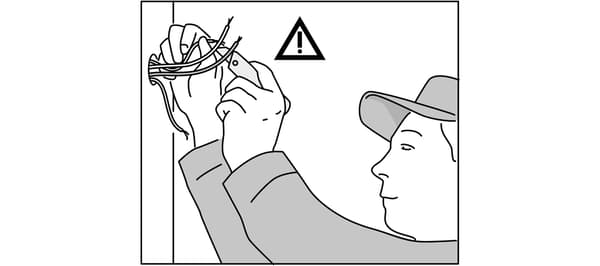
Electrical connections must be made by a qualified electrician.
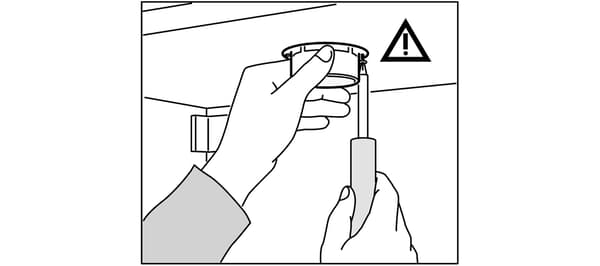
Install lighting and appliances. When drilling holes, use a piece of wood to prevent the surface from splintering when the drill bit penetrates the surface.
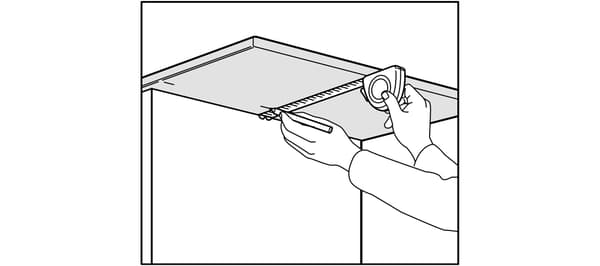
Measure the worktop. If you have bought a standard worktop, now is the time to cut it to the correct length. To avoid splinters, cut the worktop with the bottom up when using a circular saw or jigsaw. When using a handsaw, cut the worktop with the top up.
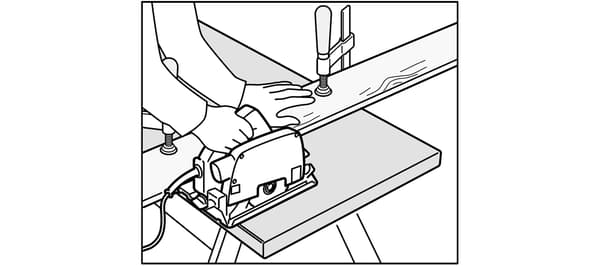
Press a straight edge onto your work surface with glue clamps to cut it to the desired length with a circular saw. It is useful if you can rest the worktop on sawhorses. Tip: have someone hold the piece to be cut so that the edge does not splinter.

Place the sink in the desired location. Trace the interior contours of the box on the underside of the panel, to position the sink correctly. Then, trace the outline of the sink on masking tape.
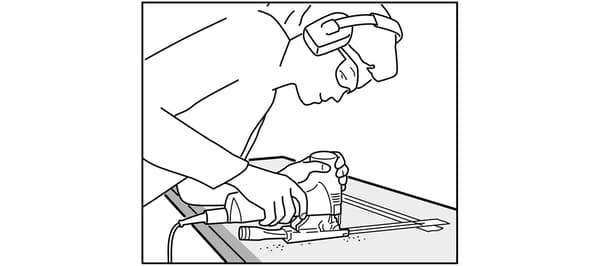
Cut with a jigsaw suitable for thick laminate panels. Pre-drill a hole in an angle so that the saw blade can be inserted.
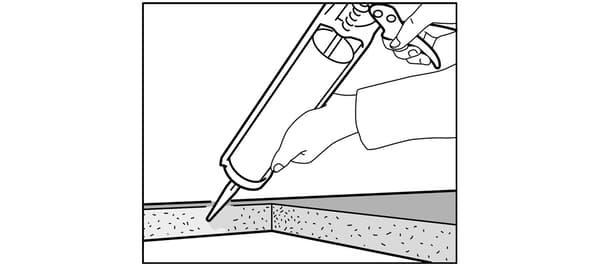
To avoid seepage into the worktop, pass polyurethane silicone along the cutout.

Install the sink according to the instructions.
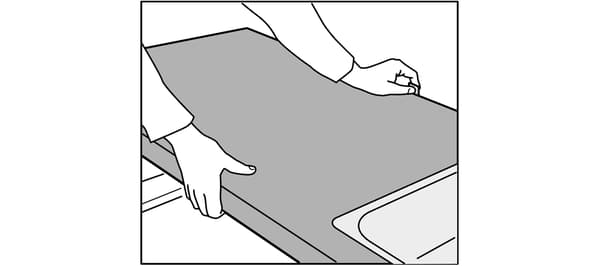
Attach the worktop following the instructions.
The installation of a hob is done in a similar way. See the installation instructions of the device.
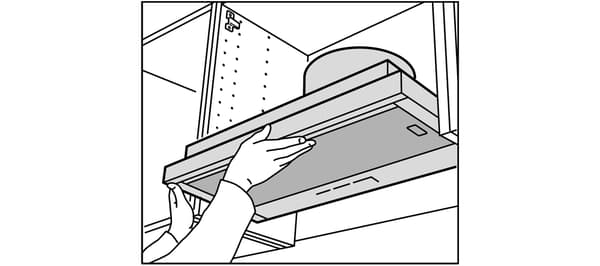
IKEA hoods can be installed in two ways: either in extraction mode, with a duct to the outside, or in recycling mode, with a charcoal filter. Each installation option is described in the assembly instructions supplied with the product.
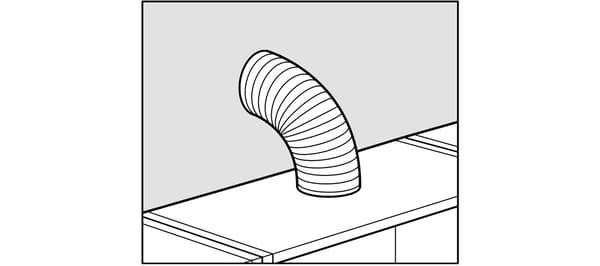
The cutout is made in the rear or top panel of the box. See assembly instructions. For reasons of safety and functionality, scrupulously respect the dimensions given in the assembly instructions.
7. Installing shelves, drawers, doors, knobs and handles
Now that the cabinets, countertops, and appliances are installed, it's time to install the drawer rails into the cabinets. Remember that the rails for inner drawers and regular drawers are placed in a different way. When the rails are mounted, put the drawers in them first before mounting the doors and shelves.
Finally, attach the knobs and handles and assemble the other cabinet furnishings (such as wire baskets). Please note that: always use the assembly instructions as a guide.
It's time for the finishing touches. You're almost done, well done! Watch our last video to complete your kitchen.


Or use these steps to complete step 7!
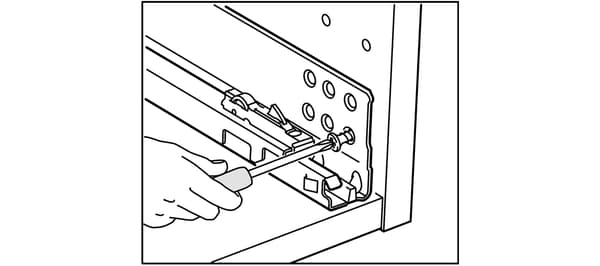
Install the slides, starting with the outer drawers. The outer drawer slides match the bottom row of holes.

After the slides of the exterior drawers, put those of the interior drawers. They correspond to the top row of holes.
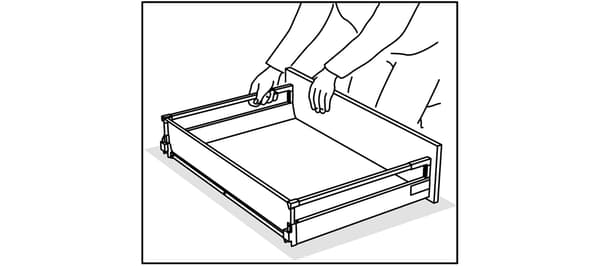
Assemble the drawers according to the assembly instructions.

Install the door hinges.

After the drawers, put the doors.
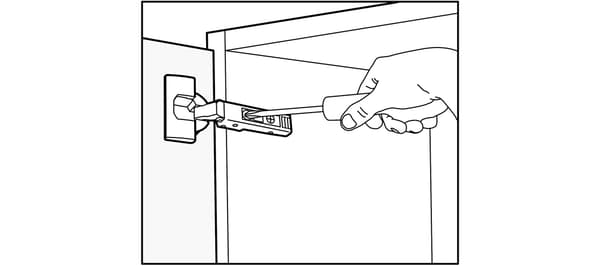
Align the doors vertically and horizontally using the hinge screws.
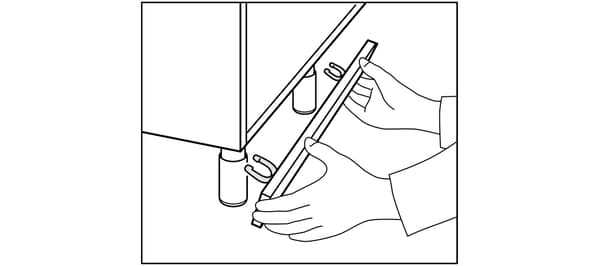
Install baseboards. See assembly instructions.
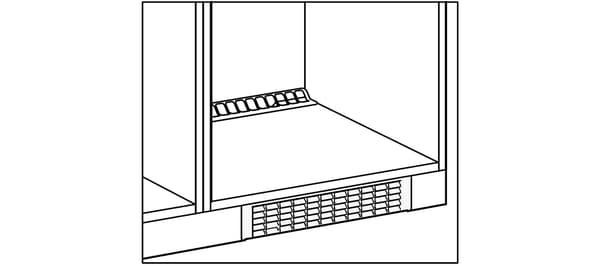
Install a possible ventilation grid between two sections of plinth.
Grattis!* Your new kitchen is ready!
*Congratulations! in Swedish.
Gave your best, but still need some help?
Let us help you build your dream kitchen. Read more about our kitchen installation service and book your appointment.