How to organise and arrange a kitchen in a shared flat
Every inch of a shared flat is up for grabs and even more so in shared spaces like the kitchen or bathroom, where a gap in any shelf or drawer is highly sought after. Do you want to see how to organise your kitchen to create more space for your things? Take a note of these tips and share them with your flatmates.
How to divide the space in shared kitchens
Every kitchen is its own world – no one knows better than you exactly how much space yours has. But you’ll see that there are some simple tricks that you can use to find the perfect combination for your kitchen.
The first thing to do is share out the drawers and cupboards for storing each flatmate’s items. Be fair! You’ll also want to keep a spare one (or part of a shelf at least) for all the shared items, like oil, salt, sugar and spices.
Oh! And another tip: play around with height. If you share out the cupboards and shelves depending on how tall each person is, it will be easier to get your things and you’ll only need a stool for grabbing that last forgotten tin of beans left right at the back.
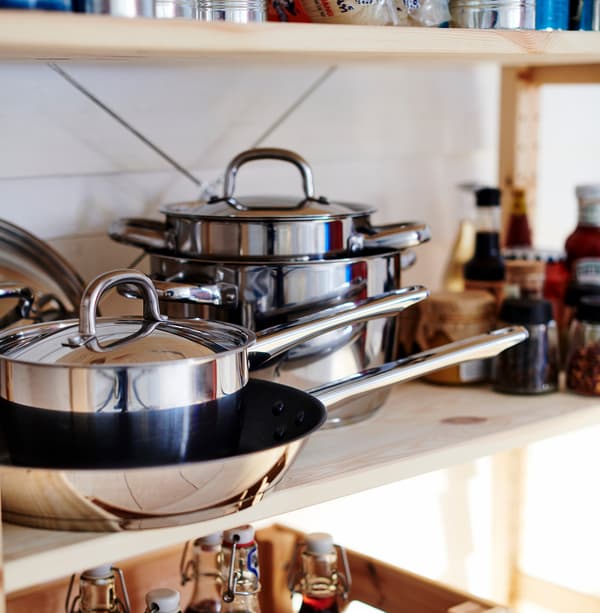
Don’t double up on kitchenware
Honestly, do you really need seven pans all the same size? If you share cooking utensils, there’s no point in having more than one of the same pot or pan. The most important thing in any kitchen (shared or not) is to have the right utensils for the way you cook. Did you know that there’s a perfect pan for your cooking style and frequency of use? Discover yours in this article:
Speaking of storage, it’s always best to keep pots in lower cupboards, but there’s a bit more choice when it comes to pans. There are three different ways you can store them: stacked on top of each other from big to small (use a protector to prevent scratching), vertically using a stand or lid spacer, or hung from hooks. Take advantage of the last option to decorate your walls at the same time. Tip: only put a few on the wall so that it looks good and not cluttered.
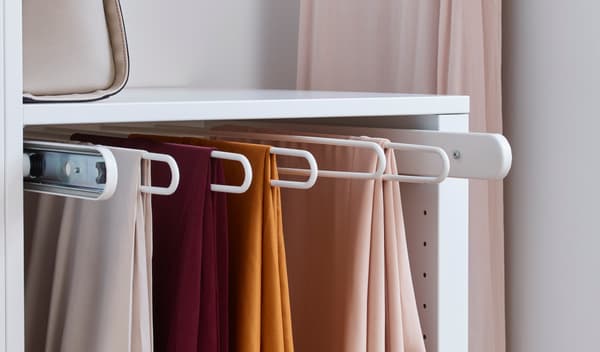
Extra space in cupboards and drawers
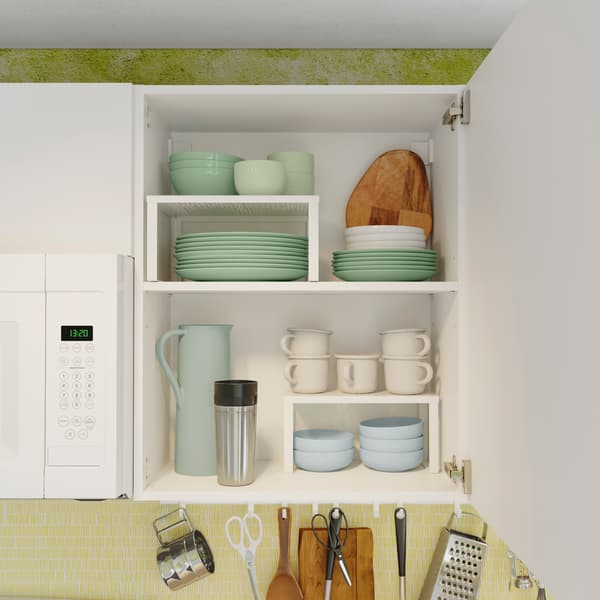
A lot of rented flats are a bit on the old side but one of the main features is their tall kitchen cupboards. We recommend that you use storage accessories to get the most out of space that at first seems useless.
For example, a classic that always comes in handy is an extra shelf (like our VARIERA), which doubles the space vertically. This lets you group and stack all your household items – like glasses, cups, plates and bowls – in the same cupboard. You can also use a plate holder to stack plates on top of each other.
But what about drawers? For your cutlery drawer, we recommend a simple cutlery tray. This will keep your cutlery separated and well organised. For drawers that are slightly higher (and even for shelves and cupboards), you can use boxes – like the VARIERA box – to group different items together, such as your dishcloths and kitchen towels, or tins and jars of food.
Oh! If you’re lucky enough to have some outdoor shelving, use a clip-on basket for extra space – this is perfect for potatoes or other fruit and veg that you want to store.
Got too many containers? Check out this video to find out how to organise them in less than a minute.

Take advantage of the walls
We love vertical storage and always want to make the most of it. Have you ever stopped to think about the potential of your walls? By adding something as simple as an extra shelf (as long as you have your landlord’s permission), you can get that extra space you need.
There are many accessories that save wall space. For example, if you can never find a specific place for your kitchen cloth, you can attach a self-adhesive hook (like the ones used for bathroom hand towels) so you don’t have to make holes or leave it on the counter or between knobs. Another very practical yet stylish accessory is a magnetic knife rack where you can hang your bigger knives. This means they won’t take up any space in your drawers and you’ll always have them handy.
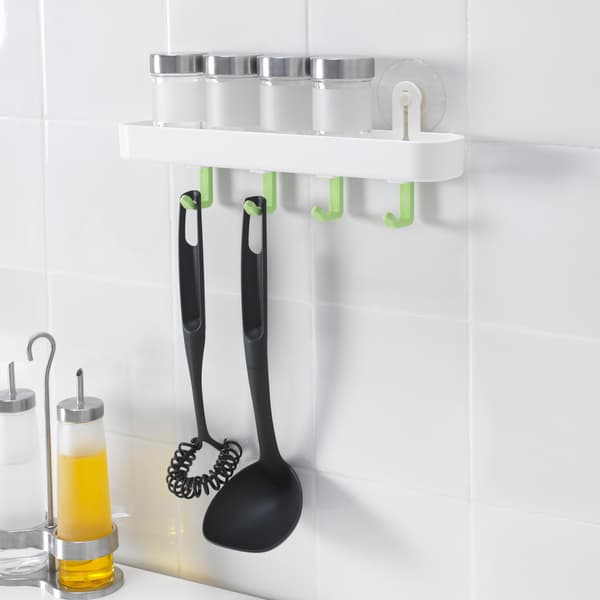
You can also add a rail where you use hooks to hang your main utensils, like ladles, spatulas and tongs. And yes, you can get rails with suction cups so you don’t have to drill anything (see the faithful IKEA GLÖMSTA tray with four fixed hooks that comes in handy around the kitchen and sink area).
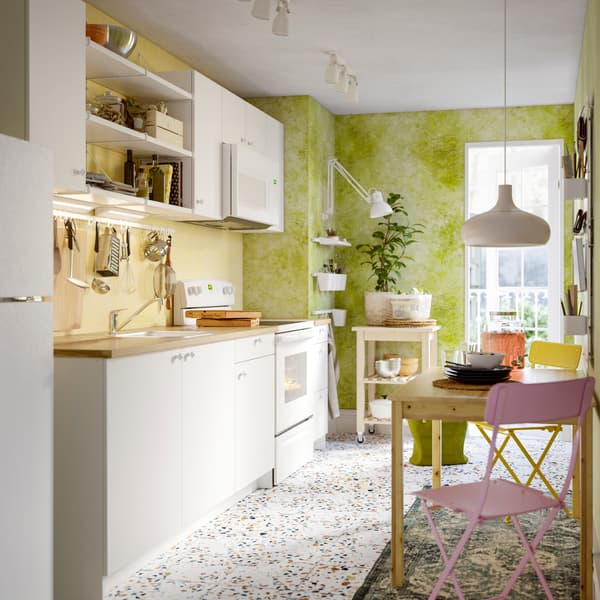
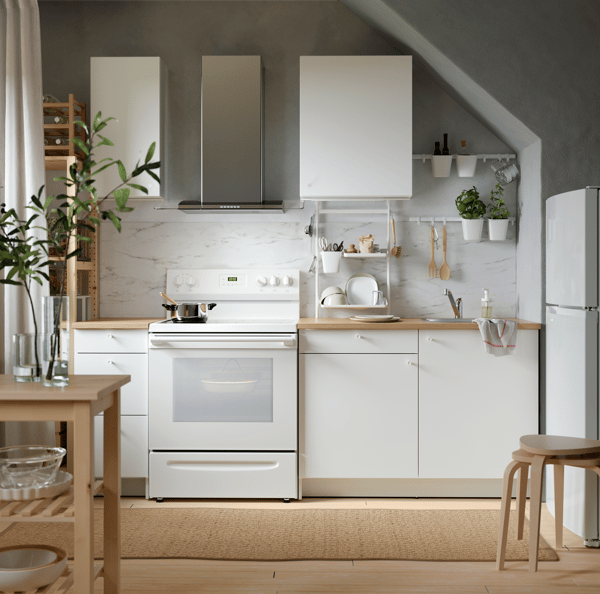
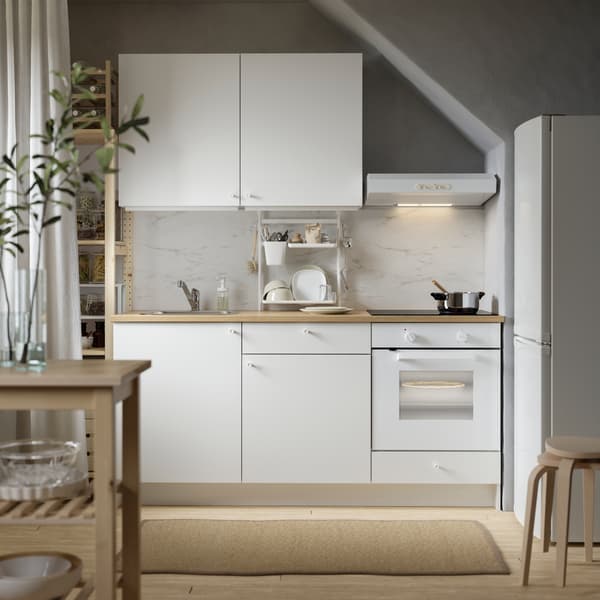
You can always find a way to use the wall. If you’re not sure how, look at how we've used layout and space in these three kitchens. You can definitely do it in yours too!

The sink area
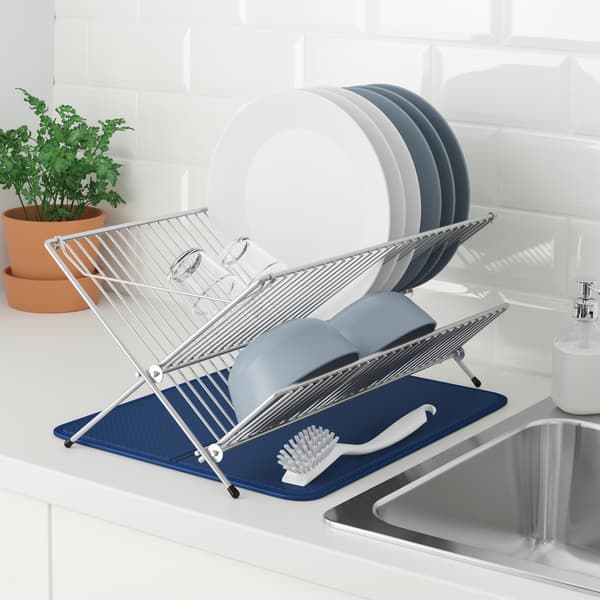
Like we said, it’s always better to wash what you use and don’t let the sink get too full, but we know that’s not always an easy task. This area is prone to filling up with dishes, glasses and the odd pan – either for washing or drying. Even more so when you live with other people! So if you’ve not got a lot of space where everything can be left to drain before putting it away and you need some help, we recommend a folding dish drainer. The great thing is that you can leave it where it best suits you at the time and then put it away when you’re finished with it, freeing back up all the space it was using. Believe us when we say it’s extremely useful.
What about the dish soap, sponges and other handwashing accessories? We've got three options. The first is the most common and involves keeping them right next to the sink in some type of container, like a basket. A second option is to keep them in a type of wall support (like the one in our previous point). The third option is to attach a basket with suction cups to the inside of the cupboard door under the sink (our TISKEN basket is perfect here since it’s smaller than the GLÖMSTA). This will free up the surface and keeping everything looking perfect.
How to organise your kitchen and manage chores
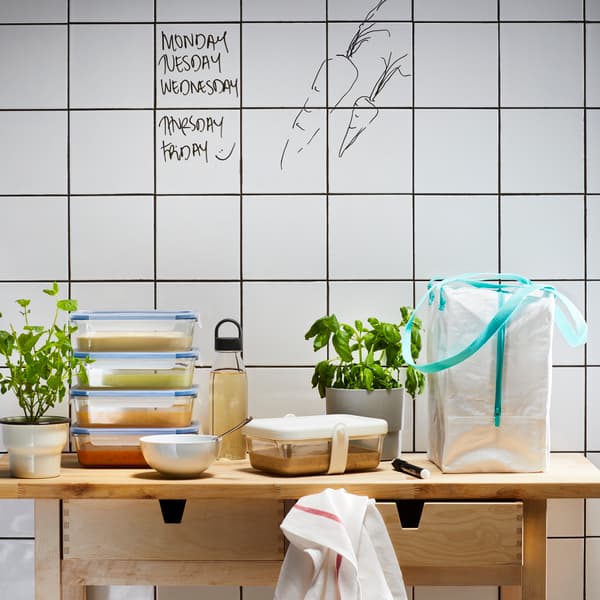
Kitchens need organisation, so, when you don’t have a laundry, there’s no better place to keep your cleaning schedule, your batch cooking schedule and your shopping list. Make the most out of it and turn it into a decorative feature! Fridge doors serve as the perfect blank canvas, but so does a nice piece of slate next to a cheerful plant, or even a section of the wall, especially if you use chalkboard paint so you can write in different colours. It will be organised and nice to look at!
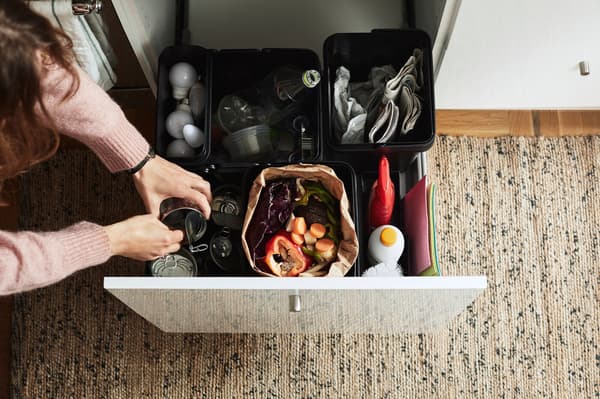
Oh! Speaking of chores, don’t forget about recycling! If you don’t have room for a separate bin for each type of waste, a good solution is a separator inside the bin. This will provide space for several items in the same container. Want to see what it looks like in less than a minute? Click on the video below:

Did you like this article? Find inspiration from these ideas:
We love it when customers use our products creatively. Why not try to do something new with them yourself? But do remember, any modifications or changes that you make to IKEA products will prevent them from being resold or used for their original use, thus invalidating IKEA product warranties and your right to return.