
Air purifiers & accessories
Enjoy peace of mind knowing you’re breathing cleaner air at home with our range of air purifiers. Find out how to install an air purifier or air quality sensor, how to integrate them into your smart home, how to change a filter and what to do if something goes wrong.

Jump to:
How air purifiers work | Installing an air purifier or sensor | Where to place an air purifier | FAQs
How does an air purifier work?
The air in our homes can contain pollutions and particles from dust, pollen, cooking and gas chemicals, which can irritate us or cause health problems. That’s why we’ve made our range of air purifiers, because we believe everyone deserves cleaner air at home.
They work by circulating the air in a room using a fan, passing it through filters to capture large particles like hair and dust, small particles like pollutants and pollen, and finally, various gaseous pollutants and unpleasant odours – if you are using a gas filter.
Getting started with your air purifier or sensor
Installing your air purifier or sensor
Our air purifiers and sensors are easy to install, so you can start enjoying better air quality at home immediately.
How to install STARKVIND
- Attach the legs with the screws.
- Remove the plastic lid from the front cable compartment. Insert the cord from the back and plug it into your STARKVIND.
- Put the socket and the remaining cord inside and put the lid back on. The cord can be adjusted up to 3.3m.
- Remove the pre-filter and particle filter.
- Remove the plastic packaging from the optional gas filter. Carefully add the gas filter by holding it in the frame.
- Remove the plastic packaging from the particle filter. Add the particle filter.
- Put the pre-filter back and click it in place.
- Attach the two front clips on the top. Attach the front and lock it in place.
- Plug in STARKVIND and press the control knob to turn it on.

How to install STARKVIND table
- Place your STARKVIND upside down then attach the legs with the screws.
- Place your STARKVIND upright on the floor. Adjust the feet to make it stable.
- Insert the cord from the bottom and plug it into your STARKVIND.
- Hide the socket and remaining cord in the box and put the plastic lid on.
- Hide the cord in the leg. The cord can be adjusted up to 3.3m.
- Remove the pre-filter and particle filter.
- Remove the plastic packaging from the optional gas filter. Add the gas filter by holding it in the frame.
- Remove the plastic packaging from the particle filter. Add the particle filter.
- Put the pre-filter back and click it in place.
- Attach the tabletop and lock it in place.
- Plug in STARKVIND and press the control knob to turn it on.

How to install FÖRNUFTIG
- Attach the legs then attach the handle. Skip this step if you’re mounting FÖRNUFTIG to a wall.
- Organise the cable then plug it into the power adaptor.
- Remove the pre-filter and particle filter.
- Remove the plastic packaging from the optional gas filter. Add the gas filter by holding it in the frame.
- Remove the plastic packaging from the particle filter. Add the particle filter.
- Put the pre-filter back and click it in place.
- Plug the cable into an electrical socket.
- Choose fan speed: low (sleep mode), medium or high.

How to mount FÖRNUFTIG to a wall
- Organise the cable.
- Use the template provided in the box to measure and mark wall placement.
- Drill two screws into the wall at their corresponding marks.
- Hang FÖRNUFTIG.
- Plug the cable into the power adapter.
- Plug the power adapter into an electrical socket.
- Turn on FÖRNUFTIG.

How to install UPPÅTVIND air purifier
- Remove the pre-filter and particle filter.
- Remove the plastic packaging from the particle filter. Add the particle filter.
- Put the pre-filter back and click it in place.
- Plug the cable into an electrical socket.
- Choose fan speed: low (sleep mode), medium or high.

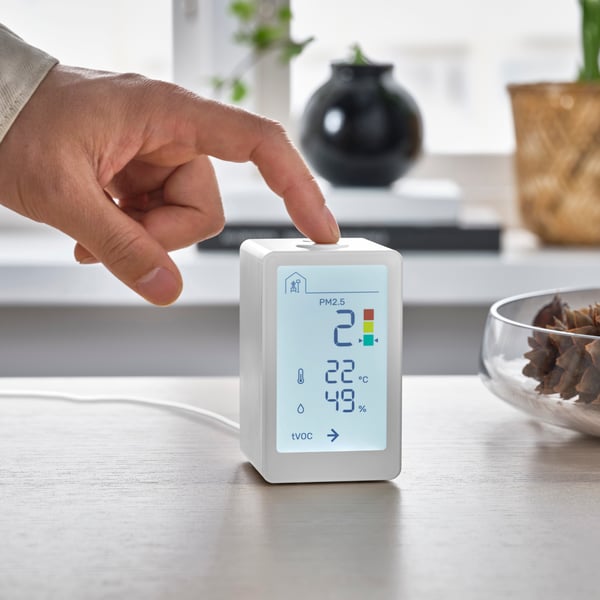
How to install VINDSTYRKA air quality sensor
- Place your VINDSTYRKA upright on a surface that’s off the floor and away from dust or dirt with at least 10cm free space in the back.
- Plug in the USB-C cable and power adapter.
- Plug the power adapter into an electrical socket.
- After plugging it in, the display will show the PM2.5 level, temperature, humidity and tVOC.
- Green = good air quality. Yellow = OK air quality. Red = not good air quality.
- The tVOC arrow shows if it’s stable level, increasing or decreasing.
- Press the mode button on the top to lit up the display.
- Press and hold mode button for settings menu where you can change brightness and choose between Fahrenheit and Celsius.

How to connect VINDSTYRKA air quality sensor with STARKVIND air purifier
- Long press the pairing buttons on VINDSTYRKA and STARKVIND at the same time to connect them.
- When the connection is successful, the pairing icon should stop blinking on the display.

Where to place your air quality sensor
VINDSTYRKA works just as well in small and large rooms, as the air quality is usually the same throughout. Just remember to keep the sensors upright, off the floor and away from dust or dirt to keep it working optimally.
- Product information page
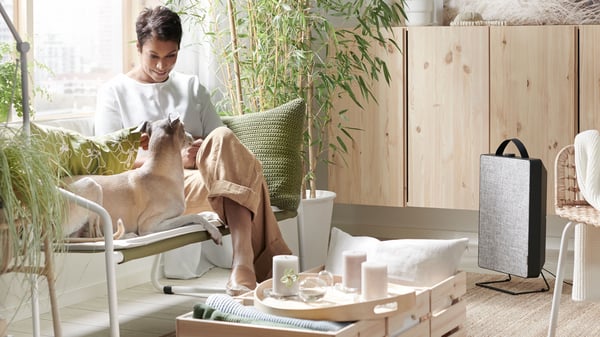
Better indoor air for everyone
Whether you have furry pets or only keep dust under the sofa, it’s a good idea to take a moment to consider the quality of your indoor air.