
An exciting new look with fabric furniture
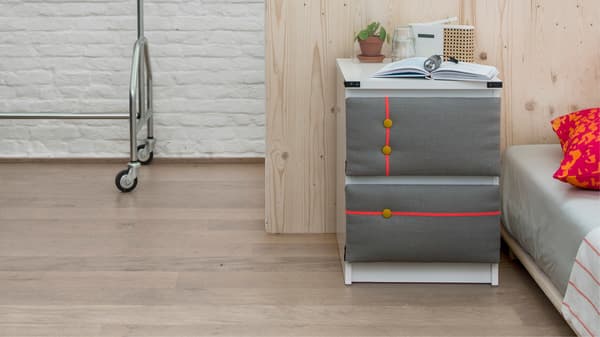
A scratch, a broken leg, an ugly stain... On a piece of furniture, even the smallest damage can be as obvious as the nose on your face. Luckily, you can fix these little details yourself – and the solution can even be exciting!
We love watching customers use our products creatively. Go for it! However, be aware that by altering or modifying IKEA products such that they can not be resold or used for their original purpose, you lose the right to a return warranty.
Step 1
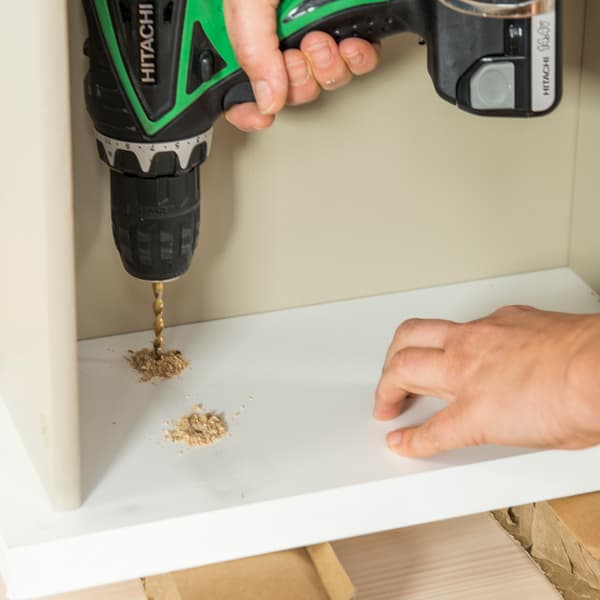
Remove the drawers from the chest. Draw a small X with a pencil where you want to place a button. Draw a second X 7 cm below the first one.
Place the drawer on two small wooden or cardboard blocks and drill two holes at the X’s.
Step 2
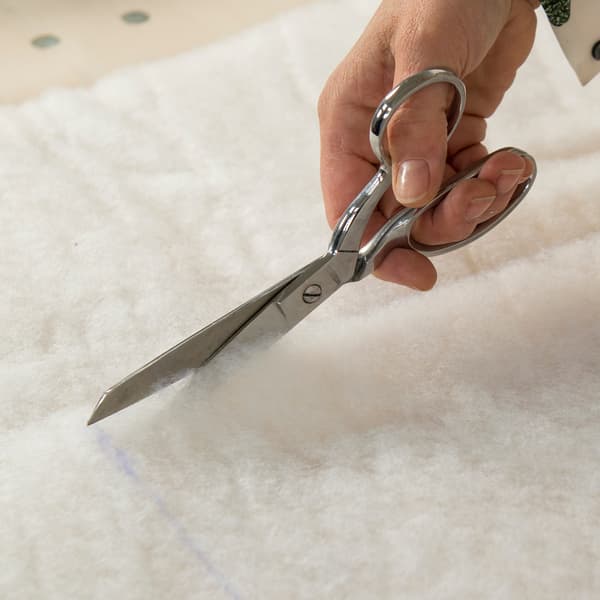
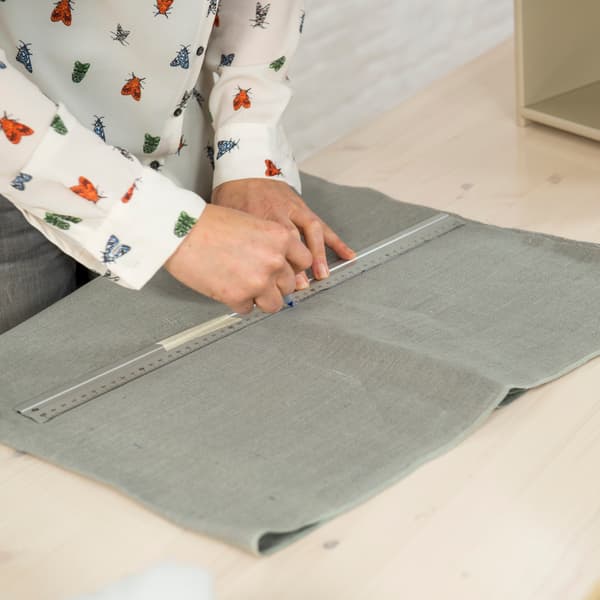
Measure the exact size of the drawer front, transfer this measurement to some exhaust hood filter foam and cut it three times from the material.
Step 3
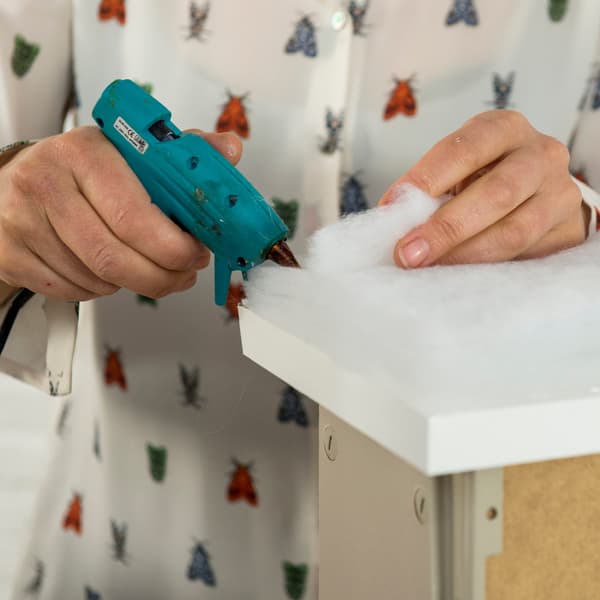
Using a glue gun, sequentially fasten the three layers to the front of the drawer.
Step 4
Cut out a piece of linen, adding 5 cm on all edges to the previous dimensions.
Step 5
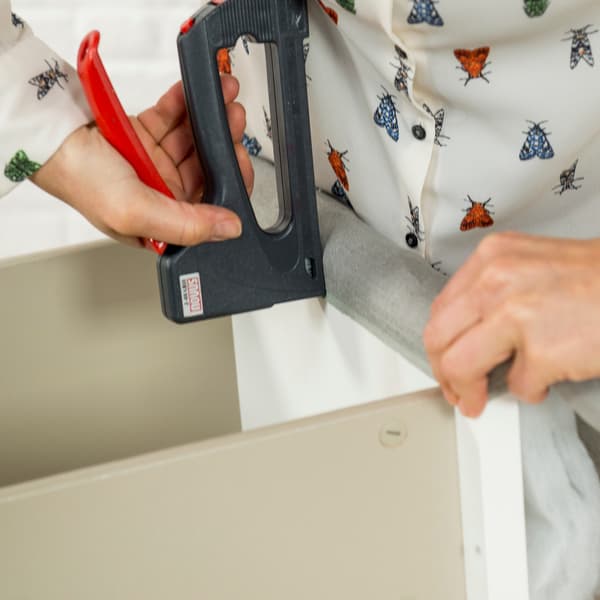
Lay the fabric over the filter foam – making sure it protrudes evenly on each side – and staple it, while folding it inside the drawer. Staple crosswise, starting by stapling the fabric at the top, then at the bottom, and finally on each side. Gently tense the fabric, without pulling too hard, so as not to form creases.
Step 6
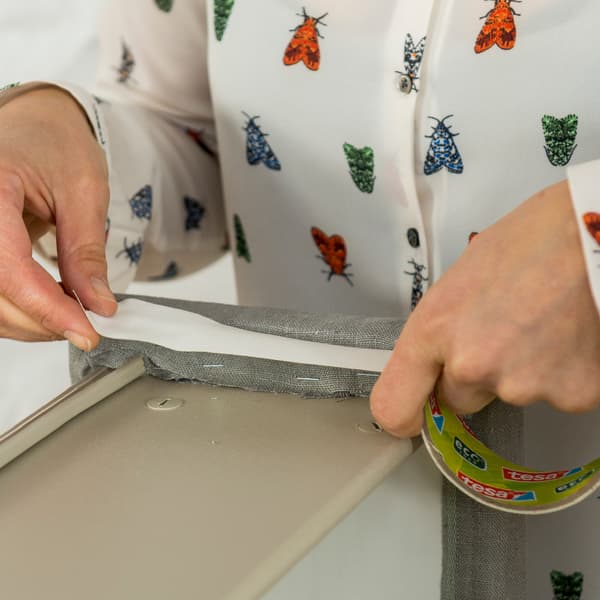
Camouflage the staples using a white adhesive fabric ribbon (Brico).
Step 7
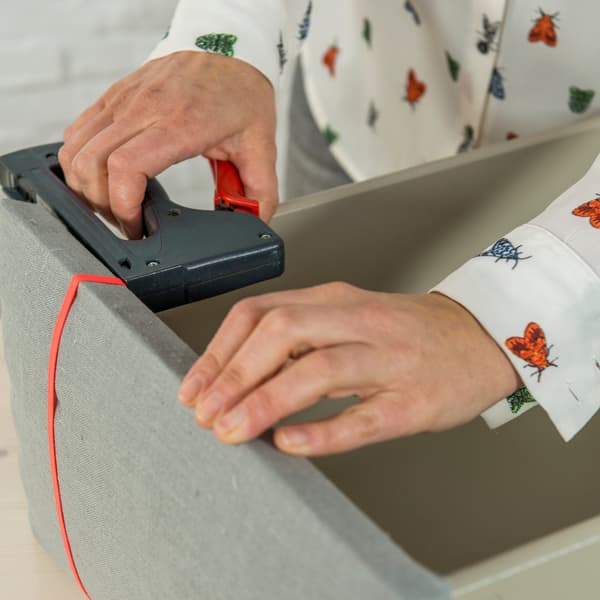
Then cut a strip of brightly coloured elastic fabric (Veritas) to size and staple it to the inside of the drawer, 11 cm from the side edge.
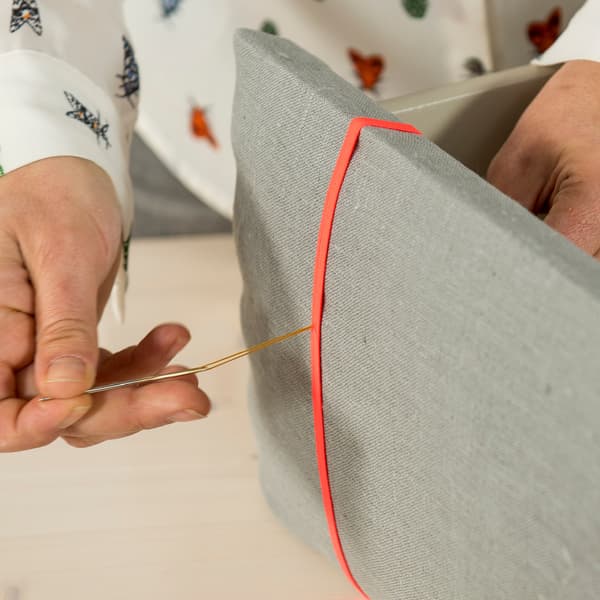
Step 8
Thread sewing thread into a sturdy needle, and pass it from the inside out through the hole in the drawer front. Attention: The needle must pass through the elastic band. Pass the needle into the button and then back into the hole. Tie the ends of the thread inside the drawer, placing a wooden match you have cut the head off of between the wire and the wood. This prevents the thread from passing forward again.
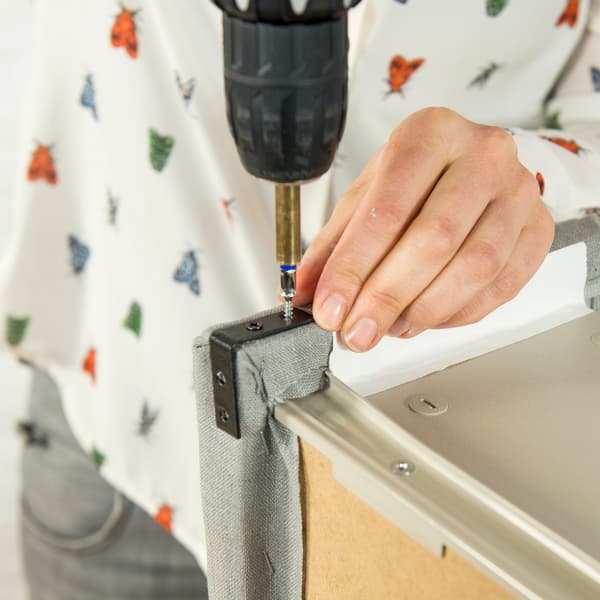
Step 9
Coat four metal corner profiles with black spray paint, and screw them to the edges of the drawer. Hide the screws by blackening them with indelible marker. For a more dynamic effect, you can vary the finish of the second drawer.
Tip
Instead of buying standard “ready-made” buttons from the store, you can also cover them with the fabric of your choice. With coverable buttons, customizing your buttons is child’s play.